
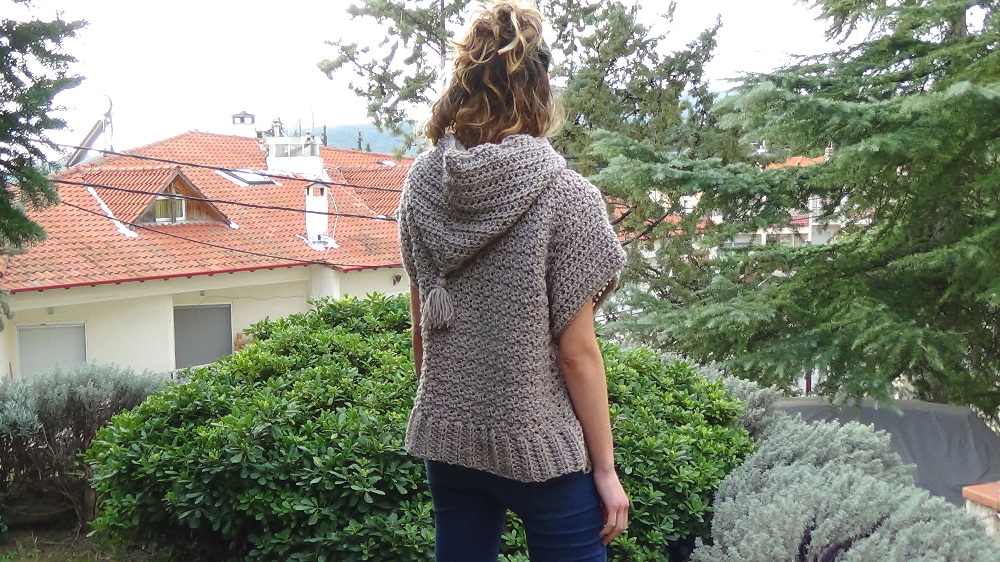
I've always had a hooded sweater or two in my closet! My idea for this design was to create a hoodie sweater that is both comfy and stylish!
It is an easy to intermediate level crocheters. Beginners need to know basic crocheting stitches as chain, slip stitch, single crochet, half double crochet, double crochet, that's it!
Simple construction pattern!
Scroll down for the free pattern
Get the ad free printable PDF pattern here
Pin this pattern to your Pinterest boards for later here
Subscribe to my You Tube channel for many crochet tutorials here

CROCHET PATTERN
Materials
Crochet Hook
9mm (M/13)


Fasten off weave in all ends.


Gauge
10 sts of
pattern =14cm width (5,5 inches)
10 row s= 13cm
height (5.11 inches)
Sizes:
Adult (Small - Medium
– large)
Note:
Directions are written for size small, changes for
size medium and large are written in parentheses.
Measurements of finished garment
SIZE SMALL: 48-50cm (18,8-19,68inches) width approximately and 58cm(22,83 inches) height
SIZE MEDIUM:53-54cm(20,80-21,25 inches) width and
65cm(26 inches) height
SIZE LARGE:59-61cm(23,22-24 inches) width and
68cm(27inches) height
Abbreviationsin US terms:
Sts=stitches
Ch=chain
Sl st=slip stitch
Sc=single crochet
Hdc=half double crochet
Dc=double crochet
Rep=repeat
prev=previous

CROCHET PROJECT
This pattern starts from bottom up and it’s a
rectangle.
·
We first work
the ribbing.
·
Then we crochet
down the side of the ribbing to make the body of pullover.
·
Then we add
edgings in both sides of front and back piece and we create sleeves at the same
time.
·
We work the hood
as a separate piece, a simple rectangle.
·
We sew the
sides, then the shoulder seams and finally the hood to the neckline matching
center of hood to center back neck.
CROCHET PATTERN
Ribbing
Chain 10 for all
sizes
Row 1: insert your hook in 2nd ch from hook and
work a hdc, hdc across in every st untill the end of row( 9 hdc). Turn
Row 2: Ch 1(does not count as hdc), hdc into the
back loop of first hdc of prev row, hdc in back loops across, turn (9 hdc)
Repeat row 2, 30
times more(34, 38)
Now we are going
to crochet down the side of our work, turn your work so the side is facing up,
we will sc in each side edge space.
 |
| I count the stitches |
BODY PATTERN
Front piece
,make one more for the back
Foundation row:ch1,sc in every side edge space, so we work 32
sc(36.40) , turn
Row 1:ch1, * sc in 1st sc of prev row, dc, in next st, (its also a
sc of prev row)* rep from * to * till the end of the row( you end up with a dc)
32 sts(36, 40), turn
Row 2:ch1, * sc in 1st st of prev row( it is a dc), dc, in next st,
(it’s a sc of prev row)* rep from * to *un till the end of the row( you end
with a dc) 32 sts(36, 40), turn
Small size: rows 3-38 rep row 2
Medium size: rows 3-42 rep row2
Large size: rowws 3s-46 rep row 2
You have made
the body.
Fasten off weave in all ends.
Now we are going
to crochet down the side of our work, turn your work so the side is facing up.
RIGHT SIDE EDGING
Note: work the same edging on the other side also, joining yarn to
the left up edge)
Row 1: ch1(does not count as hdc), hdc in every side edge
space, so we work 38 hdc(42, 46) till the beginning of the ribbing and 9 hdc ,
(1 in every ribbing st,) 47 hdc(51 ,55) in
total,turn
Row 2: ch1, hdc in 1st hdc of prev row, hdc across in every st,
47(51, 55) hdc, turn
*We will not
reach the bottom of the pullover , we will crochet only for sleeves
Row 3: ch1, hdc in next 20,(21, 22) sts 20, (21, 22)hdc,turn
Rows 4-10 rep row 3 for all sizes or to
desired length
Sleeves
are doneFasten off weave in all ends.
 |
| Here is a front piece worked -sleeve is created |
HOOD
Make a Fhdc row
of 25(25,27)sts
(This
is half the neckline perimeter)
Note: if you
make a fhdc row then work row 2 right after Fhdc row
If you choose
not to begin with a fhdc row, then:
Ch 26(26,28)
Row 1: hdc in 2nd ch, hdc across in every ch( 25(25,27) hdc. Turn
Row 2: ch1(does not count as hdc), hdc in first hdc of prev
row, hdc in every hdc 25(25, 27) hdc, turn
For all sizes: rep row2 for 39 times more
Fasten off weave in all ends.
This is the
length of the hood and you can work less or more rows, measuring from the side
neck to the top of head and back again to the other side neck.


Fold
the hood in half along back seam edge and sew center back seam.
SEWING
See at the photo below all pieces before sewing.

1: Put
the front piece onto the back and sew from the bottom side till the end of the
sleeves.
2: then
sew the shoulder seams, in each shoulder
For all sizes:
sew 13cm (5,11 in) in each shoulder\
So we have an
opening for the neckline both front and back, approximately:
28-32cm
(11-12,5 inches
3: Match center of hood to center back neck. You
also match till front center neckline where the hood stands open.
Attach yarn to
right side bottom edge if right-handed, or to left side bottom edge if
left-handed. You will sew, facing the inside
of neckline.
Fasten off weave in all ends.


HOOD
DRAWSTRING
Make a tassel
and attach it to the top of back seam of hood.
Make a draw string just chaining a foundation chain
110 cm (43 inches) long
With your hook attach the drawstring around the face.
TASSEL
Take a book or a cardboard which is 18 cm (7 inches)
long and wrap the yarn around the cardboard 20 times
Sneak a piece of yarn under the front section of yarns, tie a tight double knot, the knot will pull the yarns close together.
Cut the bottom yarns close to the edge of cardboardChain a chain 85cm (33 inches) long, this is the draw string to put around the hood.
End of tutorial.


Καλημέρα γλυκιά μου
ReplyDeleteΧρόνια Πολλά, Χριστός Ανέστη, με υγεία και κάθε καλό!
ειναι πανεμορφο
Κική μου χρόνια πολλά και αληθώς Ανέστη!! Τι κάνεις, να προσέχεις!! Τι γράφεις αυτό το καιρό?
ReplyDeletecanlı sex hattı
ReplyDeletesalt likit
heets
arkadaşlık sitesi
İ8KXO
şişli
ReplyDeleteavcılar
sakarya
elazığ
bursa
4QD4Y
شركة تسليك مجاري بسيهات 0qmn9qLOcf
ReplyDelete