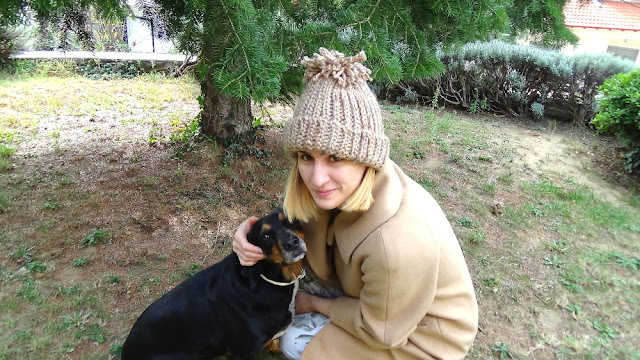
Frost and snow are in the air so this hat would make a great gift!
I am really glad to share with you my chunky simple crochet hat pattern!
Here is my daughter Christina playing in the garden with Cara.It is easy to workup and will keep you warm and cozy all winter long!
Find the ad-free printable PDF on my Etsy shop here
Skill level easy
PATTERN
Materials
-130 yds of any bulky yarn
- tapestry needle
I
used 2 skeins of Nako spaghetti effect
Crochet hook
9mm (M/13)
Finished dimensions
Height 32cm (12,50
inches)
Width 52cm
(20,50 inches) all around
Note: There is
not a certain multiple that you need for this pattern, so you can chain any
number of chains you want.
The initial chain
is the length of the hat, so if you measure from right above your eyes till the
top of your head and add 2-3 cm , that is your hat height.
We are
crocheting a rectangle shape and we can make it, as wide we want.
You can stop crocheting when the rectangle is
about 48 cm, try it on your head, after making a quick big stitches sewing and
so we will be sure where to stop.
Abbreviations in US terms
Sts=stitches
Ch=chain
Sl st=slip
stitch
Rep=repeat
prev=previous
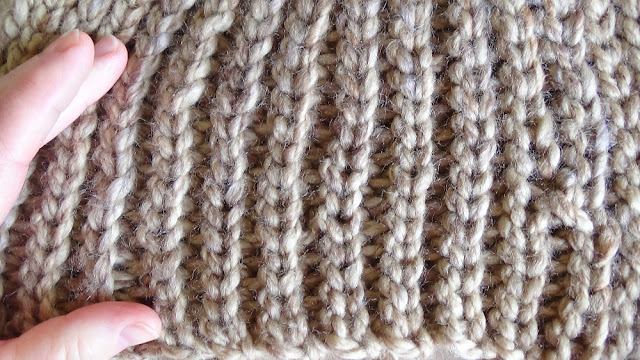
Note: this hat
is worked in rows, with sl sts in back loops. To find the right st where you
will insert your hook , you have to turn the edge of the crochet item towards
you, as in photo below and find the sl sts of prev row , they are a little
bit lower of the edge and they are glued next to other similar sts.
Chain 36
Row 1: insert your hook in 2nd ch from hook and make a sl st, sl st in every
ch across till the end( 35 sl sts)
Row 2: Ch 1, sl st in every st of prev row inserting your hook in back loops
only of the sl sts of prev row (35 sl sts)
Repeat row 2
till you reach 50 cm wide
Note: you should
be careful at the beginning of the row.
Insert your hook in the 1 sl st and not in the ch1 you have just made…and at
the end of the row, make sure you make your last 35th sl st in the last sl st
of prev row, it’s a little bit hidden this last st, so please count all sl sts in
your first rows and make sure they are the same in every row, that will keep
your edges equal.
The pattern
gives a very dense texture, pull it to open and see the ribbing. That will
happen when you wear it and opens wide.
Sewing
Fold in half.
Sew the two
sides of 32cm, together with a tapestry needle, then sew the top of the hat,
see photo below and pull the yarn to close the hole but not entirely. Leave it
open for 2cm, so you insert there the pompom.
Fasten off , weave in all ends.
Pompom
Take the yarn
and fold it in 16cm pieces 20 times as in photo.
With a piece of
yarn, tie it in the middle, then cut the edges from both sides, see photo
Fold it in two
so you have a pompom in your hand and make a wrapping around the base of pompom
see photo. Then sew it in top of hat.
That’s it!!! I
hope you love it and find it easy and cozy to wear.
You can easily
make it for children size, measuring the height you want.
Happy crocheting !!


No comments:
Post a Comment
I will be very glad to read your comment!