
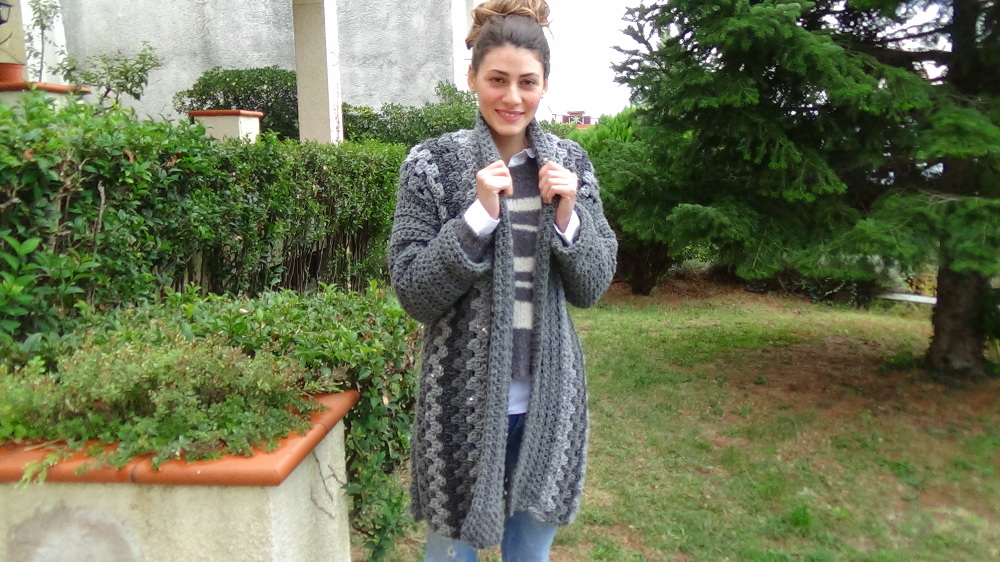
Victoria the beautiful future wife to my son is the model in the garden!
You can find my tutorial video for this cardigan on my you tube channel here
And a written free ads PDF pattern on my etsy shop here
Add this pattern to your RAvelry queue here
Pin this pattern to your Pinterest Boards for later here
FREE PATTERN
Materials
10 skeins in total of any worsted
wool -acrylic yarn
100gr=170m=186yds
tapestry needle
I used
5 skeins in dark grey Lion Brand Vanna"s Style color 150 charcoal
4 in light grey Lion Brand Vanna:s Style color 149 Silver
5 skeins in dark grey Lion Brand Vanna"s Style color 150 charcoal
4 in light grey Lion Brand Vanna:s Style color 149 Silver
1 in black grey Patons Wool Blend Aran color 52 black
Crochet Hook
M/13 US (9mm)
Gauge
A sample of 15 chains which creates three clusters is 15cm (5.9 inches) long. Crochet for three rows, the height including the foundation dc row is 9cm (3.54 inches).
Finished dimensions
Height of front piece, from shoulder down
86cm (33,85 inches)
Width of front piece, with the collar 34cm (13,38 inches)
Abbreviations
US terms
Sts=stitches
Ch=chain
Sl st=slip stitch ( slip st in uk)
Sc=single crochet (double crochet in uk)
Hdc=half double crochet ( half treble crochet in uk )
Dc=double crochet (treble crochet in uk)
Rep=repeat
prev=previous
dec=decrease
2 hdc tog=2 half double crochet in same stitch
Cluster= 3 dc together in one st
CROCHET PATTERN
We are crocheting this cardigan sideways.
This pattern starts with an initial chain which is the length of both front and back piece, so measure from your knees in front of your body, till the shoulder and all the way back, till the same point of the back of your body in your knees and chain a chain this long. I crocheted 132 chains.
The initial chain has to be a multiple of 3 and the number of dc in first foundation dc row has to be a multiple of 3+1.


Right front and half back piece
Make 2 (one more for the left front and half back piece)
Chain 132 with dark grey (this is my basic colour, I used it in collar and sleeves also)
Note: I made a foundation row of dc first
Row 1 foundation row (dark grey) : dc in 4rth ch from hook, dc in every ch till the end ( 130 dc) Note: ch3 counts as a dc
Row 2 (dark grey): ch3( counts as dc), dc in same first st,* skip 2 sts, 3 dc (cluster) in next st, rep from * till you have 3 sts left, sk 2 sts , 2 dc in top of initial ch 3 ( 42 clusters)
Row 3 (dark grey): ch3( counts as dc), 3dc in first space between clusters of prev row* cluster in every space till the end, after last cluster you should have 2 sts left , dc in top of ch3
Change colour
Row 4 (tinsel grey): ch3 (counts as dc), dc in same first st,* 3 dc (cluster) in next sp rep from * across,2 dc in top of initial ch 3
Row 5 (tinsel grey): ch3 (counts as dc), * 3 dc (cluster) in next sp rep from * across, dc in top of initial ch 3
Change colour
Now we will make an increase in central 2 clusters so we form a shoulder line. Fold your piece in half and find the 2 central spaces, for me it was the 21st and the 22nd clusters. There you should make 2 clusters with 4 dc in same space (instead of 3 dc cluster)
Row 6 (black grey): ch3( counts as dc), dc in same first st,* 3 dc (cluster) in next sp, now keep making normal 3 dc clusters in every space, till you have made 20 clusters. In 21st space, make 4 dc, in next space make also 4 dc, now keep making normal 3 dc clusters in every sp till the end, after last cluster you should have 2 sts left , 2dc in top of ch3
Row 7 (black grey): ch3( counts as dc), 3dc ( cluster ) in every space till you have made 21 clusters, in 22st space make 4 dc, in next space make also 4 dc, now keep making normal 3 dc clusters in every sp till the end, dc in top of ch3
Change colour
Row 8 (dark grey): ): ch3( counts as dc), dc in same first st,* 3 dc (cluster) in next sp, now keep making normal 3 dc clusters in every space, till you have made 20 clusters, in 21st space make 4 dc, in next space make also 4 dc, now keep making normal 3 dc clusters in every sp till the end, , 2dc in top of ch3
Row 9 (dark grey): ): ch3( counts as dc), 3dc (cluster) in every space till you have made 21 clusters, in 22st space make 4 dc, in next space make also 4 dc, now keep making normal 3 dc clusters in every sp till the end, dc in top of ch3
Change colour
Row 10 (tinsel grey): ch3( counts as dc), dc in same first st,* 3 dc (cluster) in next sp, now keep making normal 3 dc clusters in every space, till you have made 20 clusters, in 21st space make 5 dc, in next space make also 5 dc, now keep making normal 3 dc clusters in every sp till the end, , 2dc in top of ch3
Row 11(tinsel grey: ch3( counts as dc), 3dc in first space * cluster in every space till you have made 21 clusters, in 22st space make 5 dc, in next space make also 5 dc, now keep making normal 3 dc clusters in every sp till the end, dc in top of ch3
Now we have crocheted all we need for the front part. We will continue crocheting till the center of our piece and back again in order to make our back piece a little bit wider than the front. In our front part we are going to add the collar so it shall be wider then. We will crochet rows 12, 13, 14 and 15 for the back piece only.

We can make our back a rectangle shape, that means that we will work rows from the back neckline until the bottom, but I made the cardigan a little bit wider at the bottom, so it looks more elegant.
In this row we will crochet till the middle of our piece and turn back
Row 12 (black grey): ch3( counts as dc), dc in same first st,* 3 dc (cluster) in every sp rep from * (21 clusters made) ,until the middle of our piece, 2 dc in next sp , turn
Row 13 (black grey):ch3( counts as dc), * 3 dc (cluster) in every sp rep from * across, dc in top of initial ch 3
Change colour
Row 14 (dark grey): ch3 (counts as dc), dc in same first st,* 3 dc (cluster) in every sp till we have made 13 clusters , sc in next sp , sl st in same sp, fasten off
Join yarn with a sl st at the bottom of the back side (where row 14 starts) so we start a new row from bottom up.
Row 15(tinsel grey): ch3( counts as dc), ,* 3 dc (cluster) in every sp till we have made 10 clusters , sc in next sp , sl st in same sp , fasten off
Now we have crocheted the right part of the cardigan, crochet another similar piece for the left part. See at my sketch where to start off.
End of body.
Pattern tutorial photos


Pattern tutorial photos
*insert hook in 4rth ch from the hook

*row 2: ch3 made

*dc in very first st made

*first cluster worked

*row 2 (cluster row) =worked

*row 3: ch3 made, work cluster in indicated space

*row 3 worked

Sewing
Sew the back central seam


I thank you all for buying my patterns, I do love writting them and it gets a lot of time and hard work from me and a lot of yarn and since I do not have any yarn company giving me yarn for free then Etsy is a great place for me!
Have a nice time crocheting, knitting, dreaming!!

Now fold the pieces in half vertically and sew the side seams with right front and back facing you. Sew from bottom up 68cm (26,77 inches) till the under arm.
If you measure from the bottom front piece , we sew till 48th dc, the same way we count from bottom back till 48th dc, so we leave a part open for the sleeves
Sleeves
Join yarn at the bottom of the armhole
We work the sleeves joining every round with a sl st and turn
Row 1:ch2, hdc in next st, hdc across the armhole front and back piece 33 times, join with a sl st in top of ch 2 and turn
Row 2:sl st in 1st st , ch1, hdc in 2nd st and hdc across, join with a sl st in ch 1 of the beginning and turn 33 sts)
Row3-10 rep row 2
( dec row):sl st in 1st st, ch1, dc 2 tog in next 2 hdc, hdc till last 3 sts, dc2tog in next 2 sts, hdc in last st(31 sts)
Rows 12-13: :sl st in 1st st , ch1, hdc in 2nd st and hdc across, join with a sl st in ch 1 of the beginning and turn( 31 sts
Row 14( dec row):sl st in 1st st, ch1, dc 2 tog in next 2 hdc, hdc till last 3 sts, dc2tog in next 2 sts, hdc in last st(29 sts)
Rows 15-16: :sl st in 1st st , ch1, hdc in 2nd st and hdc across, join with a sl st in ch 1 of the beginning and turn( 29 sts)
Row 17( dec row):sl st in 1st st, ch1, dc 2 tog in next 2 hdc, hdc till last 3 sts, dc2tog in next 2 sts, hdc in last st(27 sts)
Rows 18-21: :sl st in 1st st , ch1, hdc in 2nd st and hdc across, join with a sl st in ch 1 of the beginning and turn( 27 sts)
Row 22 ( dec row):sl st in 1st st, ch1, dc 2 tog in next 2 hdc, hdc till last 3 sts, dc2tog in next 2 sts, hdc in last st(25 sts)
Rows 23-29: :sl st in 1st st , ch1, hdc in 2nd st and hdc across, join with a sl st in ch 1 of the beginning and turn( 25sts)
Row 30 ( dec row):sl st in 1st st, ch1, dc 2 tog in next 2 hdc, hdc till last 3 sts, dc2tog in next 2 sts, hdc in last st(23 sts)
Rows 31-32: sl st in 1st st , ch1, hdc in 2nd st and hdc across, join with a sl st in ch 1 of the beginning and turn( 23sts)
Fasten off weave in ends
Fold the edge of sleeve for 4cm (1,57 inches) and sew to secure.
Pockets
make 2
Chain 17
Row 1: in 3rd ch hdc, hdc across, turn (15 hdc, the ch2 counts as hdc)
Row 2: sl st in 1st st , ch1 (counts as a hdc, you can chain 2 instead), hdc in 2nd st, hdc across, turn (15)
Rows 3-12 rep row 2
Size of the pocket 17 x 17 cm (6,69 x 6,69 inches)
Place the pockets on the cardigan and sew with a tapestry needle, I put the pockets 50 cm (19,68 inches) from the shoulder
Collar
Join yarn with a sl st in the left bottom side of the front piece
Work 54 hdc evenly spaced along the left side till the first neck corner, work 2 hdc togeher in the corner, work 10 hdc to the back neck line, work 2 hdc togeher in the corner, work hdc down the right side.
122 sts in total for the collar.
Row 1: ch2, hdc in next st, hdc across the left front piece(54 sts till here), 2 hdc tog at the corner, then 10 hdc at the back neckline, 2 hdc tog at the corner then 54 hdc at the right front piece until the bottom, turn
(122 sts in total for the collar)
Row 2: sl st in 1st st,ch1(counts as a hdc), hdc in 2nd hdc of prev row, hdc across, turn
Rep row 2, 8 more times or more if you want.
Fasten off, weave in ends.


I thank you all for buying my patterns, I do love writting them and it gets a lot of time and hard work from me and a lot of yarn and since I do not have any yarn company giving me yarn for free then Etsy is a great place for me!


Luxe Trim 1 Click at the photograph that has Luxe Trim 1 complement call or you could see at the front of this content. Fill the form cautiously or positioned your real info. This might be in your house deal with in just a brief time.
ReplyDeleteThanks on your time. In case of any inquiry or the query, you simply make a remark we clearly provide you with short response.
Read More About It >>> https://www.completefoods.co/diy/recipes/luxe-trim-1-to-buy-weight-loss
Josephine, 37 Years – I love this product because it has helped me to control urge for meals. With the assist of weight loss plan tablets Ketogeniks Keto Diet I controlled to cast off my repeated dietary habits. I lessen the fats in the stomach, Ketogeniks and plan to use it till they acquire my fitness dreams. In addition, it helped me stay active all day. Due to the choice makers, I am very thankful to them.
ReplyDeleteRead News >> http://ketogeniksketoweb.mystrikingly.com/
Debbiesmiracles n patients for whom different techniques have fizzled and whose stoutness genuinely undermines wellbeing. In the event that break hernia side effects are perpetual and don't react to eating regimen and pharmaceutical, surg.
ReplyDeletehttps://debbiesmiracles.com/
https://paper.li/e-1581244226#/
https://www.saatchiart.com/art/Video-Debbiesmiracles/1497669/7304751/view
Sharktankpedia s. Now, this is not to say that the road to significant will be easy or that you will not have to suffer a bit to reach your desired results. There will be days when you feel like throwing in the towel and giving up. On those days you might just cave into your undeniable cravings and go crazy at your local all you can eat artery clogging buffet. But hey,that's OK. You're human. Sometimes you have to go a little nuts to get back on track. However, if you are truly committed to reaching even your most seemingly unattainable goals you can and will do it by following the plan above. Now, for your benefit let's go a little deep.
ReplyDeletehttps://sharktankpedia.org/
https://paper.li/e-1581245426#/
https://www.saatchiart.com/art/Video-Sharktankpedia-Fitness-Blog/1497677/7304815/view
ReplyDeleteGovernmenthorizons and don't react to eating regimen and pharmaceutical, surgery may get to be vital. Today, most specialists choose to perform laparoscopic surgery, since it is negligibly obtrusive and recuperation time is lessened. Blaze On the off chance that you envision yourself shedding pounds and consuming calories amid typical every day action, you will get in shape and muscle to fat quotients. It cellularly affects the body, bringing on fat cells to discharge their put away fat to be copied as vitality. The nourishment yo.
https://www.governmenthorizons.org/
https://paper.li/e-1581246800#/
https://www.saatchiart.com/art/Video-Governmenthorizons-Fitness-Boys-andGirls/1497691/7304937/view
Autobodycu sic steps to ... . EAT LESS . EAT BETTER . EXERCISE There they are. What do you think? A little anti-climatic, huh? Maybe you were expecting more... Well, let me tell you if you are able to grasp and implement this powerfully safe and effective plan is you will never again have to spend another unnecessary dime on products that don't work. You see, your body is a fine tuned management machine. If you f.
ReplyDeletehttps://www.autobodycu.org/
https://paper.li/e-1581254466#/
https://www.saatchiart.com/art/Collage-Autobodycu-Best-supplements-all-people/1497795/7305577/view
bonjour
ReplyDeletetrès jolie veste, et joli travail aux tons harmonieux. bravo